> ## Documentation Index
> Fetch the complete documentation index at: https://docs.preceptai.co.uk/llms.txt
> Use this file to discover all available pages before exploring further.
# n8n
## Connecting to n8n
Our API is designed to work seamlessly with n8n. By using the **HTTP Request** node, you can connect Precept to thousands of other applications and build powerful, automated workflows.
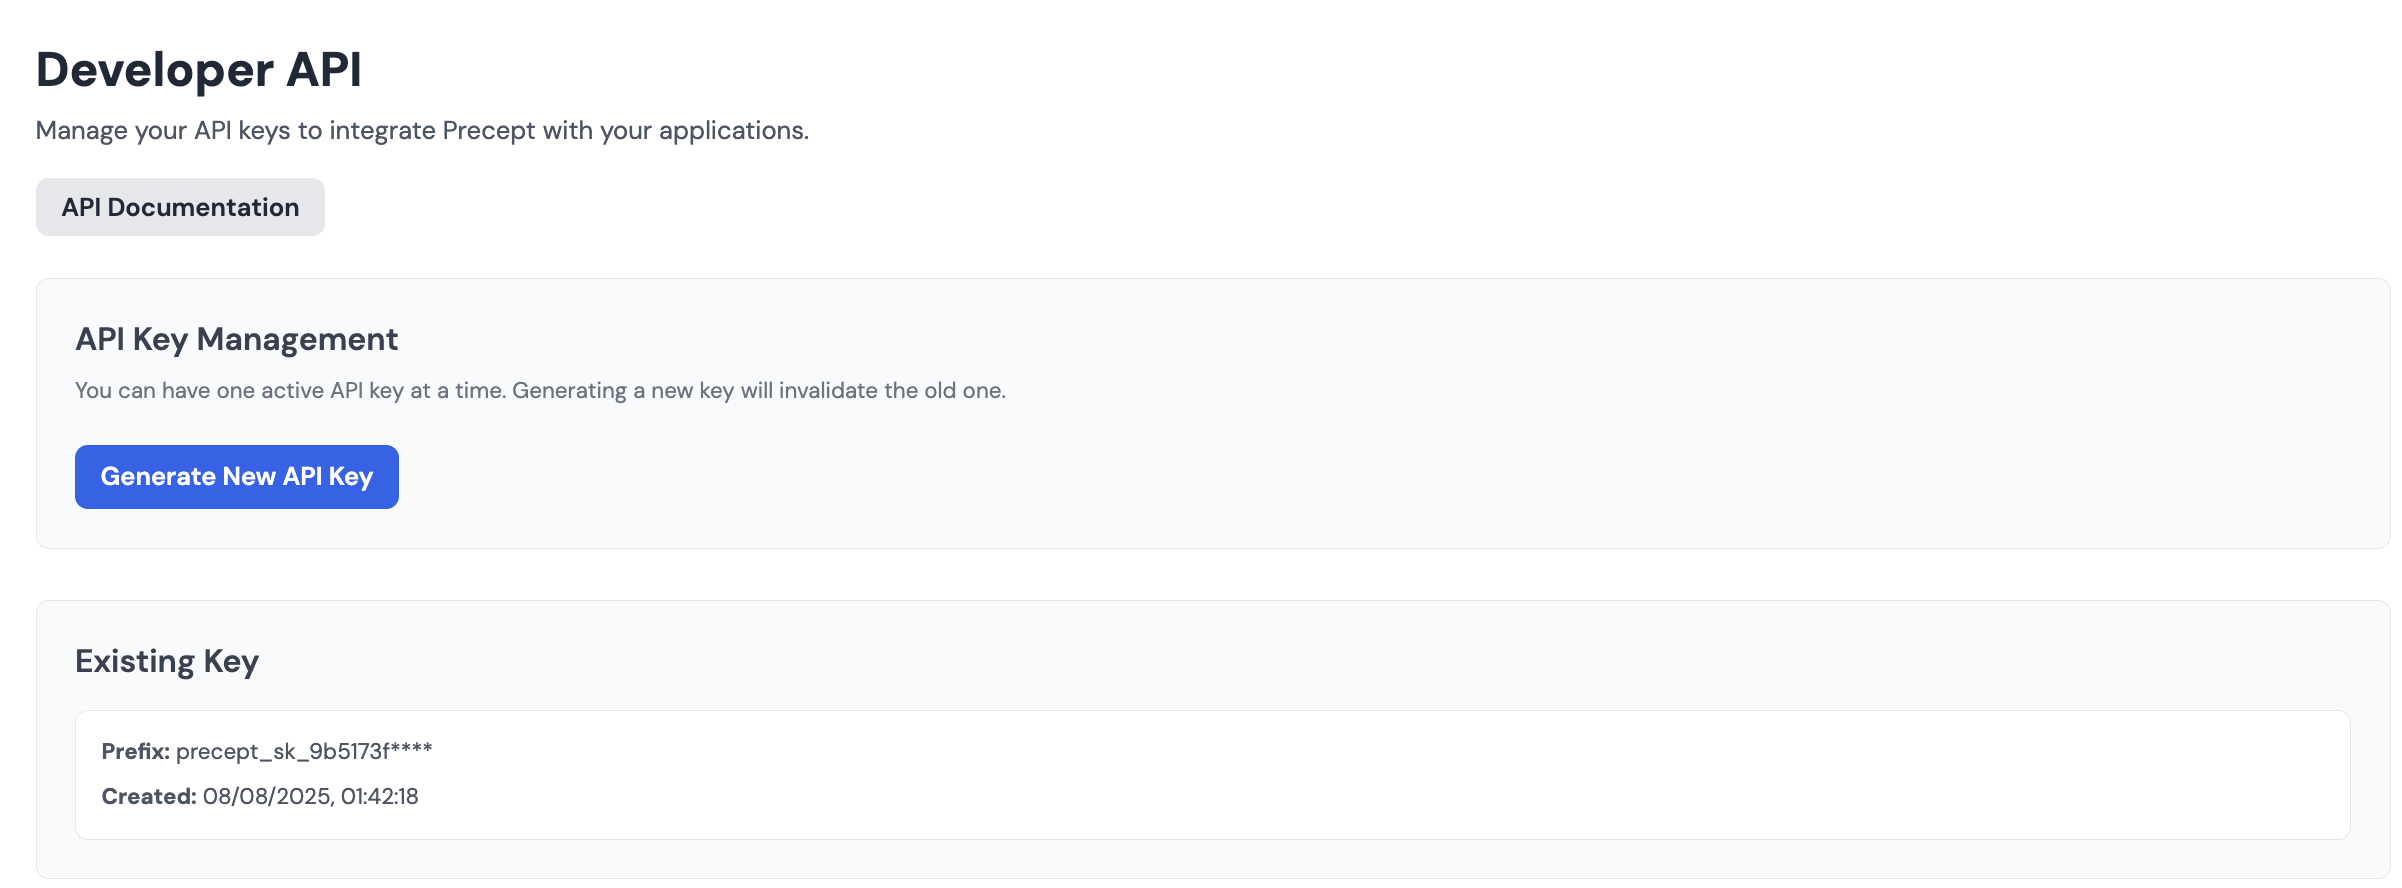
### Step 1: Get Your API Key
Before you can connect to Precept, you need your unique API key.
1. Navigate to the [Developer Dashboard](https://app.preceptai.co.uk/developer) in your Precept account.
2. If you haven't already, generate a new API key.
3. Copy the key to your clipboard. Treat this key like a password and keep it secure.
Sign up for a free trial to get your API key and developer credits.
 ### Step 2: Create a Webhook Workflow to Receive Results
Since enrichment jobs are asynchronous, you must first set up a dedicated workflow to receive the results. This workflow will start with a **Webhook** trigger that provides a unique URL.
1. **Create a New Workflow**: In n8n, create a new, separate workflow that will act as your webhook listener.
2. **Add a Webhook Trigger**: For the first node, search for and select the **Webhook** trigger.
3. **Generate a URL**: The node will display a **Test URL**. **Copy this URL** to your clipboard, as you will need it in the next step.
4. **Activate the Workflow**: Activate the workflow so it is listening for incoming data from Precept.
### Step 3: Set Up the HTTP Request Workflow
Now, create a second workflow to send the enrichment request to Precept.
1. **Add the HTTP Request Node**: In a new workflow, add the **HTTP Request** node.
2. **Configure the Request**:
* **Method**: `POST`
* **URL**: `https://api.preceptai.co.uk/v1/companies/insights`
* **Authentication**: `Header Auth`
* **Name**: `Authorization`
* **Value**: `Bearer YOUR_API_KEY`
* **Body Content Type**: `JSON`
* **Body**: In the expression editor, enter the JSON payload, making sure to include the `webhookUrl` you copied in Step 2.
```json theme={null}
{
"webhookUrl": "https://your-n8n-instance.com/webhook-test/your-unique-path",
"companies": [
{
"companyWebsite": "preceptai.co.uk",
"customData": { "id": "12345" }
},
{
"companyLinkedin": "https://linkedin.com/company/google",
"customData": { "id": "67890" }
},
{
"companyWebsite": "apple.com",
"companyLinkedin": "https://linkedin.com/company/apple",
"customData": { "id": "13579" }
}
],
"queries": ["When was their last funding round?"],
"enrichments": {
"type": "decision_makers",
"departments": ["sales"],
"decisionMakersLimit": 2
}
}
```
### Step 4: Run and Test
Execute the HTTP Request node. The API will return a `202 Accepted` response with an `enrichment_id`, confirming the job is queued. Shortly after, your webhook workflow will trigger and receive the enrichment results.
### Step 5: Example Webhook Responses
Once the enrichment is complete, Precept will send the results to your n8n webhook. Below are some examples of what the payload might look like.
```json Standard Enrichments theme={null}
{
"enrichment_id": "a1b2c3d4-e5f6-7890-1234-567890abcdef",
"results": [
{
"company_website": "https://www.preceptai.co.uk",
"company_linkedin": "https://www.linkedin.com/company/precept-ai",
"custom_data": {
"id": "12345",
"crm_id": "01234"
},
"company_data": {
"id": 12345,
"company_name": "Precept AI",
"website": "https://www.preceptai.co.uk"
}
},
{
"company_website": "https://www.unknown-company.com",
"company_linkedin": "LinkedIn URL not found",
"error": "Company not found"
}
]
}
```
```json Decision Makers theme={null}
{
"enrichment_id": "a1b2c3d4-e5f6-7890-1234-567890abcdef",
"results": [
{
"company_website": "https://www.preceptai.co.uk",
"custom_data": {
"id": "0987"
},
"decision_makers": [
{
"name": "Jane Smith",
"jobTitle": "Sales Manager",
"linkedin": "https://www.linkedin.com/in/janesmith",
"department": "sales"
}
],
"query_responses": [
{
"query": "What is their tech stack?",
"text": "Precept AI uses React, Node.js, and Python."
}
]
}
]
}
```
That's it! You have now built a complete, asynchronous workflow in n8n.
### Step 2: Create a Webhook Workflow to Receive Results
Since enrichment jobs are asynchronous, you must first set up a dedicated workflow to receive the results. This workflow will start with a **Webhook** trigger that provides a unique URL.
1. **Create a New Workflow**: In n8n, create a new, separate workflow that will act as your webhook listener.
2. **Add a Webhook Trigger**: For the first node, search for and select the **Webhook** trigger.
3. **Generate a URL**: The node will display a **Test URL**. **Copy this URL** to your clipboard, as you will need it in the next step.
4. **Activate the Workflow**: Activate the workflow so it is listening for incoming data from Precept.
### Step 3: Set Up the HTTP Request Workflow
Now, create a second workflow to send the enrichment request to Precept.
1. **Add the HTTP Request Node**: In a new workflow, add the **HTTP Request** node.
2. **Configure the Request**:
* **Method**: `POST`
* **URL**: `https://api.preceptai.co.uk/v1/companies/insights`
* **Authentication**: `Header Auth`
* **Name**: `Authorization`
* **Value**: `Bearer YOUR_API_KEY`
* **Body Content Type**: `JSON`
* **Body**: In the expression editor, enter the JSON payload, making sure to include the `webhookUrl` you copied in Step 2.
```json theme={null}
{
"webhookUrl": "https://your-n8n-instance.com/webhook-test/your-unique-path",
"companies": [
{
"companyWebsite": "preceptai.co.uk",
"customData": { "id": "12345" }
},
{
"companyLinkedin": "https://linkedin.com/company/google",
"customData": { "id": "67890" }
},
{
"companyWebsite": "apple.com",
"companyLinkedin": "https://linkedin.com/company/apple",
"customData": { "id": "13579" }
}
],
"queries": ["When was their last funding round?"],
"enrichments": {
"type": "decision_makers",
"departments": ["sales"],
"decisionMakersLimit": 2
}
}
```
### Step 4: Run and Test
Execute the HTTP Request node. The API will return a `202 Accepted` response with an `enrichment_id`, confirming the job is queued. Shortly after, your webhook workflow will trigger and receive the enrichment results.
### Step 5: Example Webhook Responses
Once the enrichment is complete, Precept will send the results to your n8n webhook. Below are some examples of what the payload might look like.
```json Standard Enrichments theme={null}
{
"enrichment_id": "a1b2c3d4-e5f6-7890-1234-567890abcdef",
"results": [
{
"company_website": "https://www.preceptai.co.uk",
"company_linkedin": "https://www.linkedin.com/company/precept-ai",
"custom_data": {
"id": "12345",
"crm_id": "01234"
},
"company_data": {
"id": 12345,
"company_name": "Precept AI",
"website": "https://www.preceptai.co.uk"
}
},
{
"company_website": "https://www.unknown-company.com",
"company_linkedin": "LinkedIn URL not found",
"error": "Company not found"
}
]
}
```
```json Decision Makers theme={null}
{
"enrichment_id": "a1b2c3d4-e5f6-7890-1234-567890abcdef",
"results": [
{
"company_website": "https://www.preceptai.co.uk",
"custom_data": {
"id": "0987"
},
"decision_makers": [
{
"name": "Jane Smith",
"jobTitle": "Sales Manager",
"linkedin": "https://www.linkedin.com/in/janesmith",
"department": "sales"
}
],
"query_responses": [
{
"query": "What is their tech stack?",
"text": "Precept AI uses React, Node.js, and Python."
}
]
}
]
}
```
That's it! You have now built a complete, asynchronous workflow in n8n.